1. Select Product

2. Add Text/Design

3. Select Sizes

4. Add to Cart


Product

Youth Swoosh Sleeve rLegend Tee

Change Product


Apple Green
M x 1
Select Size
Add Another Size
minimum quantity: 1
Configure

This is the stuff of which legends are made. The all-new Swoosh Sleeve rLegend Tee is built from sustainable recycled polyester and powered by Dri-FIT technology-so you'll get peak performance with a lower environmental impact. Neck tape for durability. Heat-transfer label for tag-free comfort. A contrast heat transfer Swoosh logo on left sleeve. Made of 4-ounce, 100% recycled polyester jersey.

View Description
Hide Description

Text Properties

Layers


Locations

  •  
     
  •  
All
Front
Created with Raphaël 2.1.2Created with Raphaël 2.1.2
Created with Raphaël 2.1.2
[]
+ Whitebase5
Your cart is empty
Search

Select Currency

USD - United States Dollar
AUD - Australian Dollar
GBP - United Kingdom Pound
JPY - Japan Yen
CAD - Canada Dollar
AED - United Arab Emirates Dirhams
AFN - Afghanistan Afghanis
ALL - Albania Leke
AMD - Armenia Drams
ANG - Netherlands Antilles Guilders
AOA - Angola Kwanza
ARS - Argentina Pesos
AWG - Aruba Guilders
AZN - Azerbaijan New Manats
BAM - Bosnia and Herzegovina Convertible Marka
BBD - Barbados Dollars
BDT - Bangladesh Taka
BGN - Bulgaria Leva
BHD - Bahrain Dinars
BIF - Burundi Francs
BMD - Bermuda Dollars
BND - Brunei Dollars
BOB - Bolivia Bolivianos
BRL - Brazil Reais
BSD - Bahamas Dollars
BTN - Bhutan Ngultrum
BWP - Botswana Pulas
BYR - Belarus Rubles
BZD - Belize Dollars
CDF - Congo/Kinshasa Francs
CHF - Switzerland Francs
CLP - Chile Pesos
CNY - China Yuan Renminbi
COP - Colombia Pesos
CRC - Costa Rica Colones
CUC - Cuba Convertible Pesos
CUP - Cuba Pesos
CVE - Cape Verde Escudos
CZK - Czech Republic Koruny
DJF - Djibouti Francs
DKK - Denmark Kroner
DOP - Dominican Republic Pesos
DZD - Algeria Dinars
EEK - Estonia Krooni
EGP - Egypt Pounds
ERN - Eritrea Nakfa
ETB - Ethiopia Birr
EUR - Euro
FJD - Fiji Dollars
FKP - Falkland Islands Pounds
GEL - Georgia Lari
GGP - Guernsey Pounds
GHS - Ghana Cedis
GIP - Gibraltar Pounds
GMD - Gambia Dalasi
GNF - Guinea Francs
GTQ - Guatemala Quetzales
GYD - Guyana Dollars
HKD - Hong Kong Dollars
HNL - Honduras Lempiras
HRK - Croatia Kuna
HTG - Haiti Gourdes
HUF - Hungary Forint
IDR - Indonesia Rupiahs
ILS - Israel New Shekels
IMP - Isle of Man Pounds
INR - India Rupees
IQD - Iraq Dinars
IRR - Iran Rials
ISK - Iceland Kronur
JEP - Jersey Pounds
JMD - Jamaica Dollars
JOD - Jordan Dinars
KES - Kenya Shillings
KGS - Kyrgyzstan Soms
KHR - Cambodia Riels
KMF - Comoros Francs
KPW - North Korea Won
KRW - South Korea Won
KWD - Kuwait Dinars
KYD - Cayman Islands Dollars
KZT - Kazakhstan Tenge
LAK - Laos Kips
LBP - Lebanon Pounds
LKR - Sri Lanka Rupees
LRD - Liberia Dollars
LSL - Lesotho Maloti
LTL - Lithuania Litai
LVL - Latvia Lati
LYD - Libya Dinars
MAD - Morocco Dirhams
MDL - Moldova Lei
MGA - Madagascar Ariary
MKD - Macedonia Denars
MMK - Myanmar Kyats
MNT - Mongolia Tugriks
MOP - Macau Patacas
MRO - Mauritania Ouguiyas
MUR - Mauritius Rupees
MVR - Maldives Rufiyaa
MWK - Malawi Kwachas
MXN - Mexico Pesos
MYR - Malaysia Ringgits
MZN - Mozambique Meticais
NAD - Namibia Dollars
NGN - Nigeria Nairas
NIO - Nicaragua Cordobas
NOK - Norway Kroner
NPR - Nepal Rupees
NZD - New Zealand Dollars
OMR - Oman Rials
PAB - Panama Balboas
PEN - Peru Nuevos Soles
PGK - Papua New Guinea Kina
PHP - Philippines Pesos
PKR - Pakistan Rupees
PLN - Poland Zlotych
PYG - Paraguay Guarani
QAR - Qatar Riyals
RON - Romania New Lei
RSD - Serbia Dinars
RUB - Russia Rubles
RWF - Rwanda Francs
SAR - Saudi Arabia Riyals
SBD - Solomon Islands Dollars
SCR - Seychelles Rupees
SDG - Sudan Pounds
SEK - Sweden Kronor
SGD - Singapore Dollars
SHP - Saint Helena Pounds
SKK - Slovakia Koruny
SLL - Sierra Leone Leones
SOS - Somalia Shillings
SPL - Seborga Luigini
SRD - Suriname Dollars
STD - São Tome and Principe Dobras
SVC - El Salvador Colones
SYP - Syria Pounds
SZL - Swaziland Emalangeni
THB - Thailand Baht
TJS - Tajikistan Somoni
TMM - Turkmenistan Manats
TND - Tunisia Dinars
TOP - Tonga Pa'anga
TRY - Turkey New Lira
TTD - Trinidad and Tobago Dollars
TVD - Tuvalu Dollars
TWD - Taiwan New Dollars
TZS - Tanzania Shillings
UAH - Ukraine Hryvnia
UGX - Uganda Shillings
UYU - Uruguay Pesos
UZS - Uzbekistan Sums
VEB - Venezuela Bolivares
VEF - Venezuela Bolivares Fuertes
VND - Vietnam Dong
VUV - Vanuatu Vatu
WST - Samoa Tala
XAF - Communauté Financière Africaine Francs BEAC
XAG - Silver Ounces
XAU - Gold Ounces
XCD - East Caribbean Dollars
XDR - International Monetary Fund Special Drawing Rights
XOF - Communauté Financière Africaine Francs BCEAO
XPD - Palladium Ounces
XPF - Comptoirs Français du Pacifique Francs
XPT - Platinum Ounces
YER - Yemen Rials
ZAR - South Africa Rand
ZMK - Zambia Kwacha
ZWD - Zimbabwe Dollars
TMT - Turkmenistan New Manats
ZMW - ERR
XBT - ERR
BYN - ERR
CNH - ERR
MRU - Mauritania Ouguiyas
STN - S
VES - Venezuela Bol?vares
MXV - ERR
VED - ERR
SLE - Sierra Leone Leones
 

Select Size


Extra Product Options

  • 300 DPI Is Required


Please enter your Layout name


Select Type Of TextSelect Type Of Team nameSelect Type Of DesignSelect placeholder type

Solid colors, good when ordering bulks
 

Please enter your text


Select a design

Please wait while the image gallery loads


Confirm Request Quote

You will be redirected to a page where you can request a quote for this blank product. Any decorations you have added to this product will be removed.


Select Product

Select Product

    Products


    How many colors are in this design?

    You now have multiple elements making up this screenprint design

    Select the colors that appear in your design.

    You need to specify the total number of unique colors used across all the elements in your design.

    This helps us determine the pricing based on the number of colors in your design.

    • (plus white base)

    You can also specify the colors used in your design eg "Red", "Blue", "pantone 1809".

    If you dont tell us, our professional designer will work it out for you.

    • (plus white base)

    Currently selected Colors


    How many colors are in this design?

    • colored image
    • original image

    How many colors in your design?

    4 Colors

    Select the colors to be used

      COLOR PICKERS GO HERE
     

    Your Cart

    Products Qty Price
    Total $0.00
     

    Re-use existing screen print designs

    You have already used screen printing in this order. To avoid additional screen costs you can re-use an existing screen print design for this product.

    You can

    Re-use existing designs

    or


    WarningError

    Your layout contains images that have been resized to the point where they may appear blurred.

    Below-quality images listed

    Your layout contains images that appear outside the design area.

    You cannot save the product until you have moved the images within the design area.

    Your layout contains images that appear outside the design area.

    Your layout contains overlapping images.

    You cannot save the product until you have moved the images so they are not overlapping.

    Blank product purchase is not allowed

    You will not be able to purchase this product until you add a decoration design.

    Inactive blank product in use

    Minimum quantity requirements not met

    You will not be able to purchase this item until you have increased the quantity.

    Screen(s) still updating...

    You will not be able to purchase this item until all re-used screens have been updated.

    Your layout contains images that have been resized to meet the 25 megapixel limit for raster images and they may appear smaller than intended. You can avoid the raster size limit by uploading artwork in vector format when possible.

    By clicking OK, you are agreeing to accept the final product regardless of image quality. Click Cancel if you want to go back and fix the images.


    Add Team name


    Edit Team name.

    Add Another Team name
     

    Uploading file


    Online Designer Help 

    The Designer is an easy to use tool that allows you to design your own product. You can select a product to decorate with stock art, your own designs or photos and text.

    To change the currently selected product:

    1. Click on the Change Product button in the Product panel.
      Product Button

      The Select Product popup will be displayed.
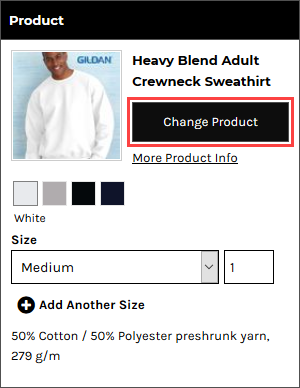
      Product Details Panel.png
    2. Click on a product to select it.

    To add text to a product:

    1. Click on the Add Text button in the Designer Toolbar.
      Add Text Button
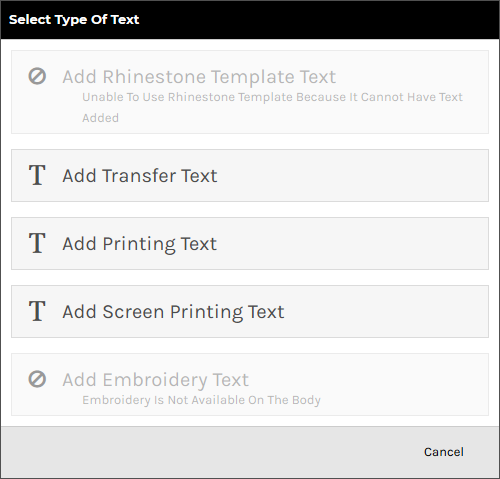
    2. Select the type of process to be used for the text in the Select Type of Text popup. Only options that are supported by the product being decorated will appear.
      Select Type Of Text Popup
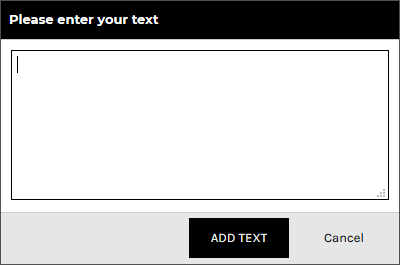
    3. Enter the text, and click ADD TEXT.
      Please Enter Your Text Popup

      The text will appear inside the decoration area in its bounding box with editable size dimension, resize and rotate handles and delete control available.
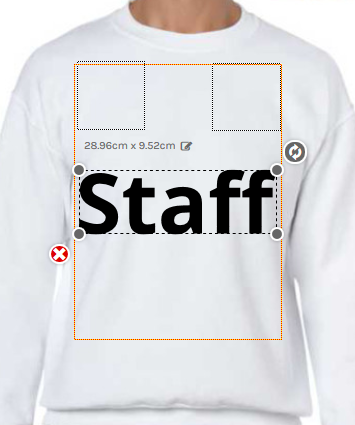
      Inserted Text

    To adjust text properties:

    1. Click on the View and organize layers button in the View Toolbar.
      View And Organize Layers Button
    2. Click the text object you wish to adjust the properties of.

      The Text Properties panel will appear on the left side of the Designer.
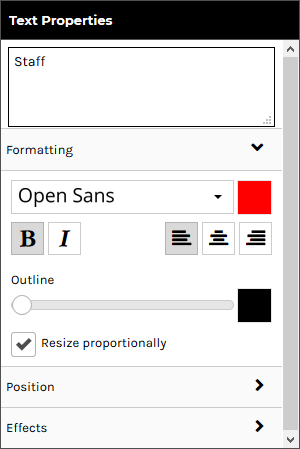
      Text Properties Panel
    3. Configure the text as required:
      • Text Box: lets you edit the text.

      Formatting

      The Formatting tab is expanded by default and contains the following controls:

      • Font: change the font via the Select A Font popup.
      • Font color: change the text color via the color popup.
      • Bold: boldens the text.
      • Italics: italicizes the text.
      • Left-align: aligns text to the left when it spans multiple lines.
      • Center-align: center-aligns text when it spans multiple lines.
      • Right-align: aligns text to the right when it spans multiple lines
      • Outline: lets you apply an outline to the text. At the leftmost position on the slider, no outline is applied. Moving the slider to the right applies an outline that increases in thickness the further right it is moved.
      • Outline Color: lets you set the color of the outline via the color popup.
      • Resize Proportionally: when this checkbox is ticked, the text will keep its original proportions when you resize it.

      Position

      Effects are only available for the direct to garment printing decoration process.

      Click on the Position tab to expand it. Expanding the Position tab reveals the following controls:
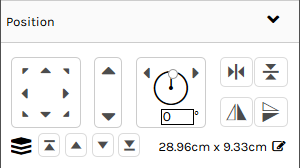
      Position Controls
      • Position controls: lets you move the selected text within the decoration area using any of the eight directional arrows.
      • Size controls: lets you increase/decrease the size of the selected text by clicking on the up/down arrows.
      • Rotation controls: lets you turn the selected text around its center axis. You can do this by:
        • Specifying a specific angle at which to rotate the text.
        • Clicking on the left arrow to rotate the text 5 degrees to the left.
        • Clicking on the right arrow to rotate the text 5 degrees to the right.
      • Horizontal Centering controls: Horizontally centers the selected text within the decoration area.
      • Vertical Centering controls: Vertically centers the selected text within the decoration area.
      • Layering controls: lets you change the layer at which the selected text is positioned in relation to other decorations.

      Effects

      Click on the Effects tab to expand it. Expanding the Effects tab reveals the following text effects:
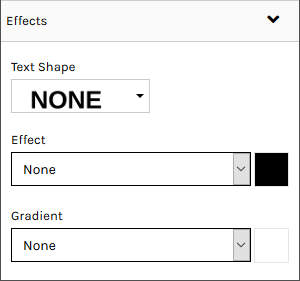
      Effects Controls
      • Text Shape: lets you alter the shape of the text. The options indicate the shape that they will apply.
      • Effect: lets you add a shadow or glow effect to the text.
        • None: no effect is applied.
        • Shadow: applies a drop shadow to the text.
          • Offset: lets you set the position that the shadow will be offset from the text.
          • Blur: lets you set the level of blurring effect that will be applied to the shadow.
        • Glow: applies the appearance of a glow around the text.
          • Strength: lets you set the intensity of the glow.
          • Blur: lets you set the level of blurring effect that will be applied to the glow.
      • Effect Color: lets you set the color of the Effect via the color popup.
      • Gradient: sets a horizontal or vertical gradient of color between the selected font color and the gradient color.
      • Gradient Color: lets you set the color of the Gradient via the color popup.

    To add a design using the Add Design button:

    1. Click on the Add Design button in the Designer Toolbar.
      Add Design Button
    2. Select the type of process to be used for the design in the Select Type of Design popup. Only options that are supported by the product being decorated will be enabled.
      Select Type Of Design Popup
    3. Browse to and click on the design you want to add in the Select a design popup.
      Select A Design Popup

      You can select designs from the following sources:

      • Upload a new design: Click on Upload Image to upload a design from your device.

        Raster, vector, and embroidery file types are supported in the formats as listed below:

        • Raster (PNG, JPG, JPEG, GIF, TIF)
        • Vector (CDR*, PDF, EPS, PS, SVG, SVGZ)
        • Embroidery (EMB)

        Vector based graphics will have modifiable elements such as text and colors editable on the fly by users.

        *CDR requires the CorelDRAW app to be enabled. When a CDR file is uploaded it will be automatically converted to SVG format so that it can be modified in the Online Designer.

      • Your own previously uploaded design designs: These will appear under the Upload Image button if you have uploaded designs before.
      • Instagram: Click on the Instagram button and enter your credentials to access your Instagram pictures.
      • Facebook: Click on the Facebook button and enter your credentials to access your Facebook pictures.
      • Store Designs: designs exclusive to the store.
      • Stock Designs: Third-party designs available for use in DecoNetwork.
    4. Click SELECT DESIGN.

      The design will appear inside the decoration area in its bounding box with editable size dimension, resize and rotate handles and delete control available.
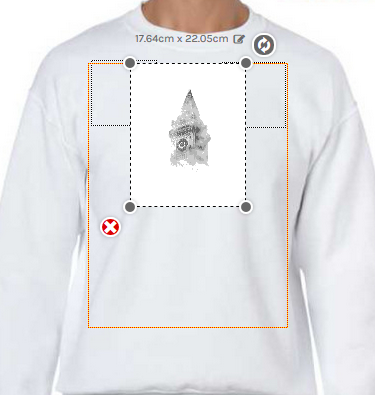
      Inserted Design

    To add a design by drag and drop:

    1. Drag a design file from your computer into the decoration area of the product in the Designer.

      The decoration area will be highlighted when the mouse pointer is within its boundaries.
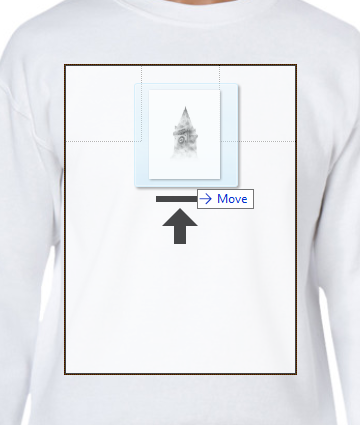
      Highlighted Decoration Area
    2. Release the mouse button to drop the design into the decoration area.

      The Select Type of Design popup will be displayed with the supported decoration types enabled for the product selected.
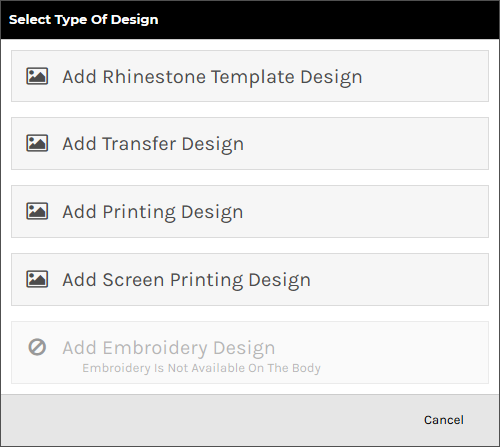
      Select Type Of Design Popup
    3. Select the decoration process you want to be used for the design.

      The system will begin uploading the design file to your own design library.

      Uploading Design.png
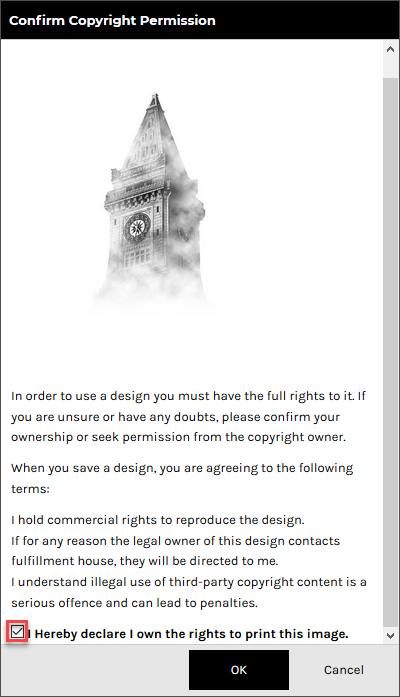
    4. Tick the, I hereby declare I own the rights to print this image, checkbox in the Confirm Copyright Permission popup to verify that you have permission to use the design.
      Confirm Copyright Permission Popup
    5. Click OK.

      The design will appear inside the decoration area in its bounding box with editable size dimension, resize and rotate handles and delete control available.

      Inserted Design

    To adjust design properties:

    1. Click on the View and organize layers button in the View Toolbar.
      View And Organize Layers Button
    2. Click the design object you wish to adjust the properties of.

      The Image Properties panel will appear on the left side of the Designer.
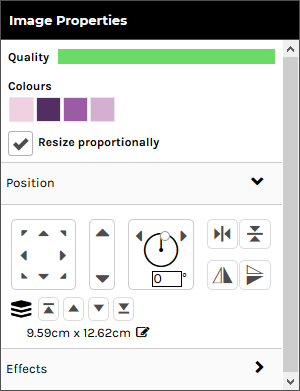
      Image Properties Panel
    3. Configure the design as required:
      • Quality: Shows you a bar indicating how clear the image is for printing. The indicator reflects how well the raster-based graphic is going to print before blurring too badly. If this drops below a certain threshold, the system will warn the customer that their print quality will be compromised.

        This option is only available for raster designs.

      • Colors: Shows you the colors currently used in the design.
        • edit: Click on the link to edit the design colors.

        This option is not available for designs that have restrictions on customizing.

      • Resize Proportionally: when this checkbox is ticked, the design will keep its original proportions when you resize it.

        This option is not available for embroidery, transfer and rhinestone designs.

      • Ungroup: click on the link to ungroup the design into its component elements.

        This option is only available vector-based designs.

      Position

      Click on the Position tab to expand it. Expanding the Position tab reveals the following controls:

      • Position controls: lets you move the selected text within the decoration area using any of the eight directional arrows.
      • Size controls: lets you increase/decrease the size of the selected text by clicking on the up/down arrows.
      • Rotation controls: lets you turn the selected text around its center axis. You can do this by:
        • Specifying a specific angle at which to rotate the text.
        • Clicking on the left arrow to rotate the text 5 degrees to the left.
        • Clicking on the right arrow to rotate the text 5 degrees to the right.
      • Horizontal Centering controls: Horizontally centers the selected text within the decoration area.
      • Vertical Centering controls: Vertically centers the selected text within the decoration area.
      • Layering controls: lets you change the layer at which the selected text is positioned in relation to other decorations.

      Effects

      Click on the Effects tab to expand it. Expanding the Effects tab reveals the following controls:
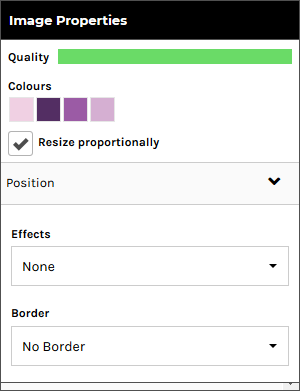
      Image Properties Panel - Effects Section

      These options are only available for raster designs.
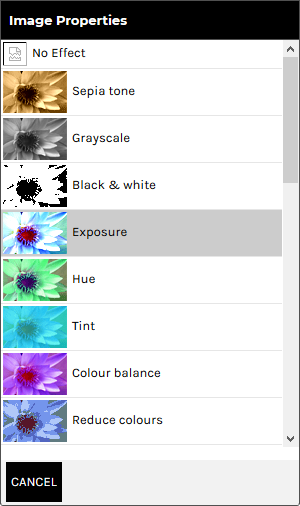
      • Effects: lets you apply a special effect to the design that alters its appearance. Click on the Effects drop-down box to see the effects options.
        Effects Options

        Click CANCEL to return to the Effects Panel.
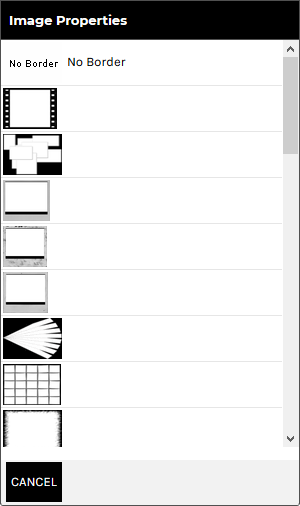
      • Border: lets you apply a border to the boundary of the design. Click on the Borders drop-down box to see the border options.
        Border Options

        Click CANCEL to return to the Borders Panel.


    To specify product sizes and quantities:

    1. Click on the Product button in the Designer Toolbar.
      Product Button

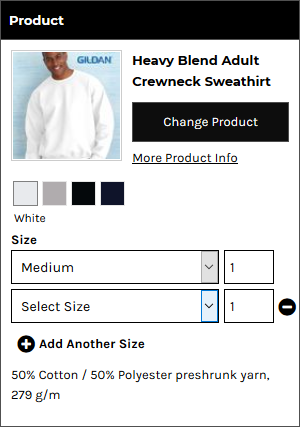
      The Product panel is displayed.

      Product Panel
    2. Select a size from the Size drop-down list and specify the quantity required in the input box for that size.
    3. Click Add Another Size to specify quantities for each size required.
      Another Size Fields

    To specify product size and quantity when products are sold in bulk:

    1. Click on the Product button in the Designer Toolbar.
      Product Button - Bulk Quantity

      The Product panel is displayed.

      Product Details Panel - Bulk Quantity

      The Quantity field will show the minimum quantity you can purchase.

      Note, you can not select multiple sizes when products are sold in bulk.

    2. Select a size from the Size drop-down list in the Product Panel.
      Product Details Panel - Size Dropdown
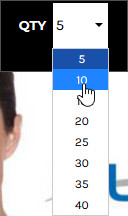
    3. Select a quantity from the QTY drop-down list in the Designer Toolbar.
      QTY Dropdown

    To arrange design layers:

    1. Click on the View and organize layers button in the View Toolbar.
      View And Organize Layers Button

      The Layers panel is displayed showing all the text and design objects present in the decoration area.
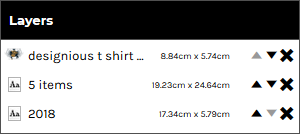
      Layers Panel
    2. Arrange the elements as required:
      • To move a layer up, click on the up arrow to move it to a new position in the list. Likewise, to move a layer down, click on the down to move it to a new position in the list.
      • To delete a layer, click the cross icon at the right of the layer.

    To re-group template design elements:

    You can group elements from a template design that you have ungrouped.

    1. Click on the View and organize layers button in the View Toolbar.
      View And Organize Layers Button

      The Layers panel is displayed showing all the text and design objects present in the decoration area.

      Layers Panel - Ungrouped Elements
    2. Hold down the Ctrl key and click on each layer you want to be grouped.
    3. Click on the Group Selected Items button in the View Toolbar.

    To add team names:

    "Team name" allows automatic formatting of text in the form of a small name and large number beneath, decorated onto the product. This is useful for teams and other groups who would like a jersey-style name and number on their product.

    1. Click on the Add Team name button in the Designer Toolbar.
      Add Team Name Button
    2. Select the decoration process you want to be used for the team names.

      The Add Team name popup will be displayed.

      Add Team Name Popup
    3. Select a size and specify the quantity required for that size.
    4. Click Add Another Size to specify quantities for each size required.
    5. Click Next.

      The Edit Team name popup will be displayed containing Name and Number fields to match the quantities specified in the Add Team name popup.
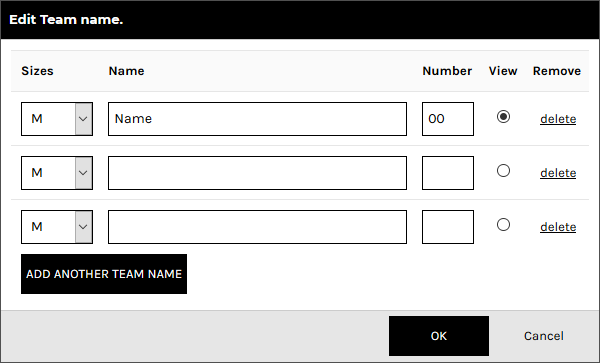
      Edit Team Name Popup
    6. Configure team names by entering the team name and number for each product to be decorated.

      The item selected in the View column will be the item that is displayed in the Designer.

    7. Click Add Another Team Member and specify the team name and number for each additional product required.
    8. Click OK when done.

      The team name and number will be set up on the product as text areas whose properties may be adjusted as per normal text, except that any changes made will apply to all team name products.
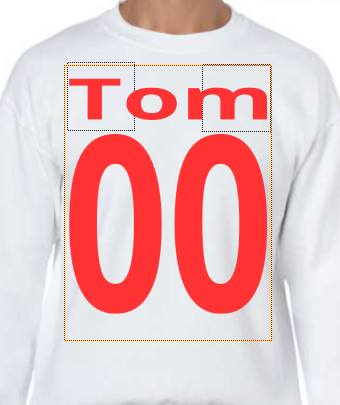
      Team Name On Product

      See the section, To adjust the properties of text in the Designer, above, for details on how to adjust the formatting, adjust the position and apply effects to the text fields.

    9. If you want to edit the teamnames and numbers, select a text area and click Edit teamnames in the Text Properties panel to display the Edit Team name popup.
    by